
Skills
- Perform image management procedures.
- Demonstrate professional visual communication skills.
Resources:
Textbook: Adobe Photoshop CC: Classroom in a Book
Adobe TV: http://tv.adobe.com/
Double Vision
OVERVIEW
You will create a “double portrait” in which you merge a photo of yourself as a child with a current photo of yourself using Photoshop techniques. This new portrait should be a true representation of you!
OBJECTIVE
Using digital images students will use selection methods, masks, filters, image adjustments, and other Photoshop tools to create a double portrait that represents themselves and their Photoshop skills.
INSTRUCTIONS
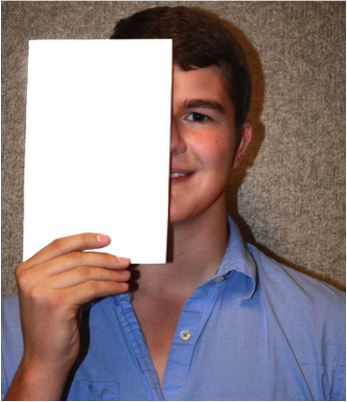
- Use the green screen and studio lighting and have a friend take your portrait holding a 5” x 7” card in front of 1⁄2 of your face:
Like this (this one does not show a green screen)
- Import and open your image in Photoshop. Make you image fit into an 8” W x 10” H canvas.
- Scan and import your kid portrait into a new Photoshop file.
- Try your best to edit (adjustments) for color balance and lighting so the two pictures look similar. Try the sharpen filter, photo filters, color balance and curves to get it just right.
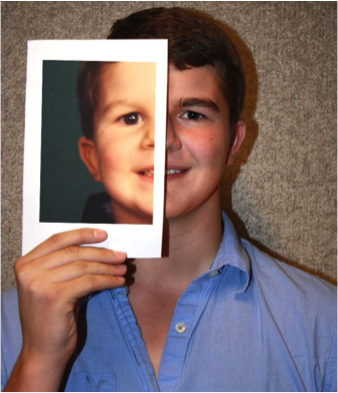
- Now, it is time to place your portrait onto the paper you are holding in the first photo! Select what you would like to move and drag it over (or copy and paste). You are now trying to line up facial features. You may have to use Transform (Crtl T, hold the sift button to stay in proportion). Your photo may cover your hand- that is ok for now- just make sure you have a little bit of a white border around the sides of the paper. You can use the polygonal lasso tool to get rid of overhanging photo.
 If you photo is over your hand, you may need to create a layer mask to erase parts of the photo so it looks like your hand is covering the photo:
- Next, change your background! Use color select to get rid of the background (select>color range>click on the background color and delete).
- Have fun with the background, play around with brushes and filters to make this a true portrait if you.
- Save the file as a .PSD. This will keep all of the layers. Then compress the file by saving it as a .JPG and submit it.

ASSESSMENT
You will be graded according to the following criteria to earn a total of 35 points:
- Project turned on time. (5 pts.)
- All files set up and saved in correct format. ( 5 pts.)
- Effective use of Photoshop tools (selections, masks, blending tools, layers). (5 pts.)
- Effective color correction and adjustments (5 pts)
- Quality of work and Photoshop techniques, originality, imagination, and detail – Elements of image create visual unity, proportion of elements, color balance,… (5 pts.)
- Overall design is visually appealing. (5 pts.)
- Student always uses classroom project time well. Conversations are primarily focused on the project and things needed to get the work done and are held in a manner that typically does not disrupt others. (5 pts)