
Skills
- Perform image management procedures.
- Demonstrate professional visual communication skills.
Resources:
Textbook: Adobe Photoshop CC: Classroom in a Book
Adobe TV: http://tv.adobe.com/
Monster Project
OVERVIEW
In this Project you will use many of the skills you have acquired throughout your Photoshop Lessons. You will build a monster of yourself by finding different pictures that represent you. You will accomplish this selecting and moving images to create a unique persona of yourself.
OBJECTIVE
At the completion of the project students will have demonstrated the ability to make selections, mask selections, and move objects to transform an image.
INSTRUCTIONS
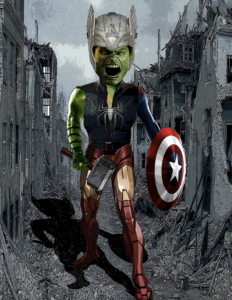
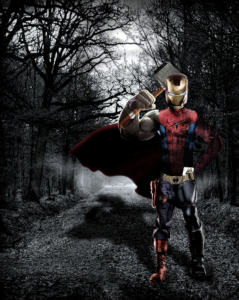
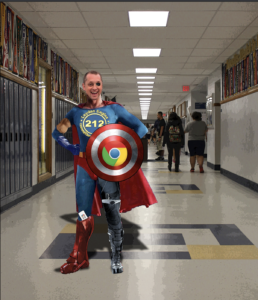
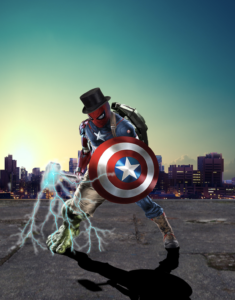
STEP 1: EXAMPLES
Look at the examples below to get an idea on what you will be creating.
STEP 2: GET IMAGES
In order to make yourself into a monster you have to find images that represent you. You should be looking for HIGH QUALITY images that can represent parts of your body as well as a background for your monster.
Find images and then save them into a folder so you have them available to build your monster. You should use at least 10 images in your project!
You should be looking for body parts as well as a background image or images.
STEP 3: RESOURCES
Watch the video below for a short guide on how your monster will be created.
STEP 4: SETUP YOUR WORKSPACE
Create a New Photoshop document that is 8 inches wide x 10 inches height. The resolution needs to be 300 Pixel/Inch. Have the new document in CMYK Color Mode.
Save your project as Monster_(yourinitials).psd
STEP 5: MAKING YOUR MONSTER
Open up the images you have saved in Photoshop. Start by creating selection around those images and then move them into your project document. Use various selection methods to make your selections. Arrange your selections in a manner that creates a unique monster figure.
STEP 6: ADD A BACKGROUND
Incorporate a background image into project that the monster can be placed on. You make want to incorporate more than one background image to make a unique and creative environment for your monster.
STEP 7: TOUCH UPS
Do any touch ups to make you monster look as if it has clean edges. Also use color correction tools to make the image look as if it is cohesive with its other parts.
STEP 8: SHADOW
Add a shadow on the ground of your monster. You can do this by selecting all of the parts of your monster and duplicate them. Then transform the shape using the transform tools to make it look like it is reflected onto the ground. Then add a dark fill color to represent a blackish shadow.
STEP 9: SAVE & SUBMIT
Save your work as Monster_(yourinitials).psd Keep it as a Photoshop file so all layers stay available.
Also save it as a .JPG so it flattens all the layers. Submit the .PSD and .JPG file into the WEB shared drive in your appropriate folder.
EXAMPLES
ASSESSMENT
The rubric Below will be used to assess your work.
|
Criteria |
Outstanding |
Meeting Expectations |
Below Expectations |
Unacceptable |
| Created a realistic ”Monster“
(10 pts) |
Transformed images to create an exceptional looking monster | Transformed images to create a good looking monster. Could use some improvement. | Transformed images to create a poor looking monster. Could use some improvement. | Transformed images to create a poor looking monster. Could use a lot of improvement. |
| Used at least 10 images to create the final image
(5 pts) |
Used 10 or more images to make a creative work. | Used less than 10 images | Only used 6images | Unclear how many images were used as the layers were merged |
| Used color adjustment tools and/or lighting filters to enhance your work
(5 pts) |
Adjustments are used to improve and enhance the images | Some adjustments are used but image could additional improvement | Adjustments are very obvious or used improperly | No attempt was made to adjust or enhance the image |
| Selections
(5 pts) |
Image selections are made cleanly and look realistic | Image selections are made cleanly but could use additional improvement | Image selections are very obvious or used improperly | No attempt was made to use proper image selections |
| Turned in a PSD file with the proper image size, color mode, resolution and all of the layers included.
(5 pts) |
PSD file has at least all the layers named appropriately. The file is the correct size, resolution, and color mode. | PSD file has most of the layers named appropriately. The file is the correct size, resolution, and color mode. | PSD file has none of the layers named appropriately. The file is the correct size, resolution, and color mode. | PSD file has none of the layers named appropriately. The file is not the correct size, resolution, and color mode. |
| Creativity
(10 pts) |
Final Image is unique and unlike other images seen online, in class or else where. Image has Artistic content, color, lighting, shadows etc. . | Final Image is an imitation of another piece seen, in class or else where. Image has Artistic content such as Elements and Principles of Design. | Final Image is just like another piece seen, in class or else where. Or Image does not have any Artistic content | Image does not follow any Principles of Design or have any Elements of Design. |
| Time Management
(5 pts) |
Project was turned in on time and classroom time was used effectively. | Project was not turned in on time and classroom time was not used effectively. | ||
| TOTAL 45 PTS
_______/45 |