
Chapter 3: Working with Text
After Effects is home to one of the most dynamic and powerful text tools available for motion graphics. If you’ve had previous experience with type tools in Photoshop, then you’ll feel right at home inside of After Effects. It builds on that foundation and goes much further with the range of control and options available to you.
Chapter Objectives
- How to add Text layers
- Change the settings in the Character Panel
- Browse animation presets using Adobe Bridge.
- How to animate text
Exercise
Instructions
Using After Effects and Text Presets you will create a 6 second advertisement for a Musician, Actor, or Movie.
- Create a new 6 second composition with the default settings.
- Import an image
- Insert headline text (use the character panel to style the text – fonts, colors, etc..)
- Apply a Text Preset to the text.
- Insert a second line of text (use the character panel to style the text – fonts, colors, etc..)
- Apply a Text Preset to the text.
- Adjust the setting in the Timeline for your text presets
- Use your creativity! – Use transformation options for the text!
- Save the After Effects file as: Ch3Ex_(yourinitials)
- Export the composition as a movie file- (File>Export>Add to Render Que) as Ch3Ex_(YourInitials) and submit the video file in the Google Shared Drive
Notes:
- Use your creativity!
- Explore the different text presets
- Adjust the settings in the timeline
- Play with scale, rotation, opacity!
Grading (10 Pts)
- The file was rendered correctly- including the correct file name
- You followed the directions
- At least two lines of text are present
- Text was styled
- At least two text presets were used
- You added your own creativity to the file
- The file was submitted on time
Exercise 2
Instructions
Follow the instructions below to create animated text using animation effects and text animators. You will create a 10 second animation.
- Open up After Effects and create a new composition with the default settings.
- Save the file as AE_Ch3Ex_2(YourInitials).
- Import the video footage provided here, and it to the composition. Make the video footage fit to the composition window by selecting the video footage layer and holding ctrl+alt+F (windows).
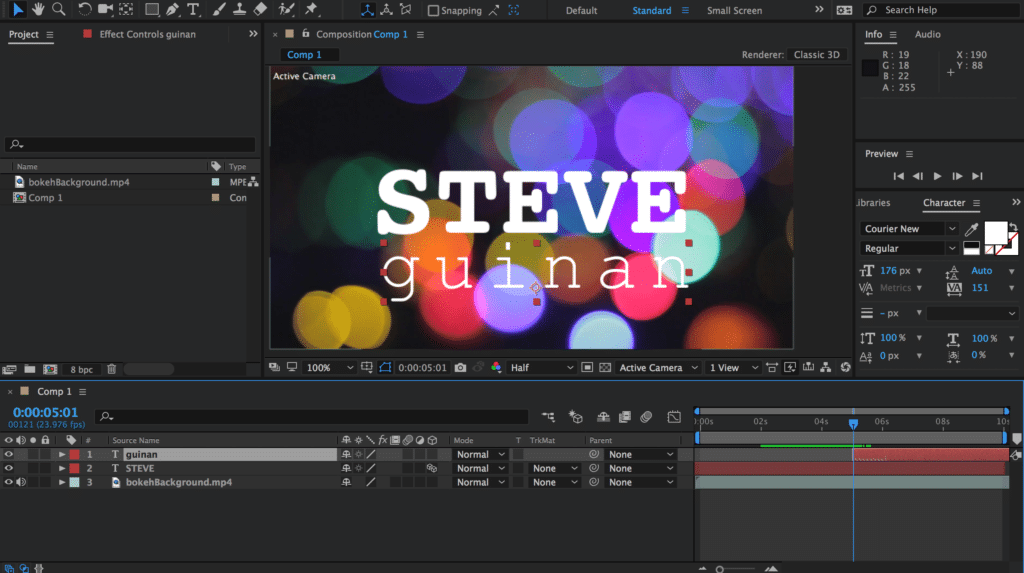
- Select the Horizontal Type Tool in the Tools Panel. You can also use the keyboard shortcut Cmd+T. Click inside the Composition panel and type your first name. When you’re done, make sure to press Enter on the numeric keypad to exit text-editing mode. If you press Enter or Return on the regular keyboard, this will begin a new line or paragraph. If you don’t have a numeric keypad, you can also select the layer name to finish typing and exit text-editing mode.
- Select your text and choose center alignment, pick a font that you like, and size your text to make it big. (Around 200px)
- Select your name layer and go to Layer>Transform>Center Anchor Point in Layer Content. This should put the anchor point in the center of your name.
- With your layer still selected go to Layer>Transform>Center in View. This should center your name in the composition area.
- With the text layer still selected go to your Effects and Presents. Select Animation Presets and Open the Text Folder Options. Play around with the different options and choose one that works best for you. (Play with the presets to get better effects!)
- Select your text layer and then press “U.” Doing this will quickly show the keyframes of a particular layer. Make sure that you are using the selection tool. Select the last keyframe and drag it left to increase the speed of the animation and drag it to the right to slow it down. Have your name animation last for a few seconds but make sure to keep your name shown for a whole 10 second long video.
- Create a new text layer, with your last name and place it under your first word. Choose a font, color, and size that complements your first text layer. (Use something different) While the layer is selected, position the Current Time Indicator to the five-second mark and press “[” — this will trim your text layer and start it at five seconds.
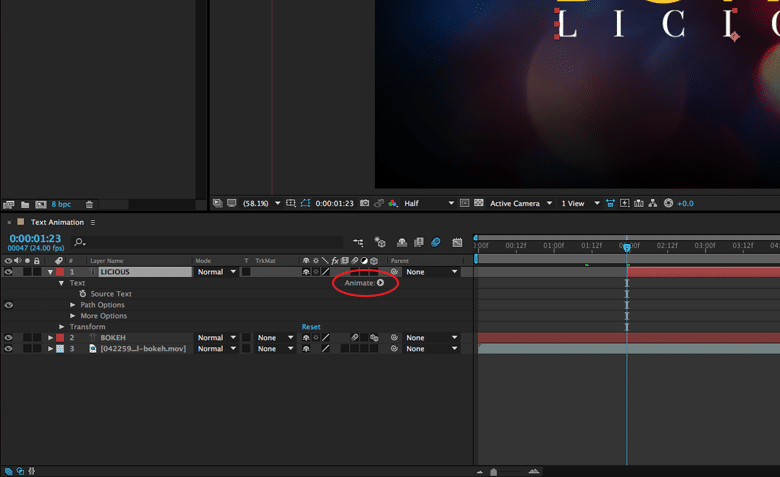
- Expand your new text layer. On the right, you’ll see the Animate menu. Click on the pop-up triangle. This will show you the list of properties you can animate. Choose Tracking.
- We want to start the letters of the text expanded and bring them closer together, so we’ll animate their Tracking properties. Input “50” as the Tracking amount. Expand Range Selector 1, make sure that your Current Time Indicator is still at the five-second mark, and press the stopwatch on the Start property to create a keyframe.
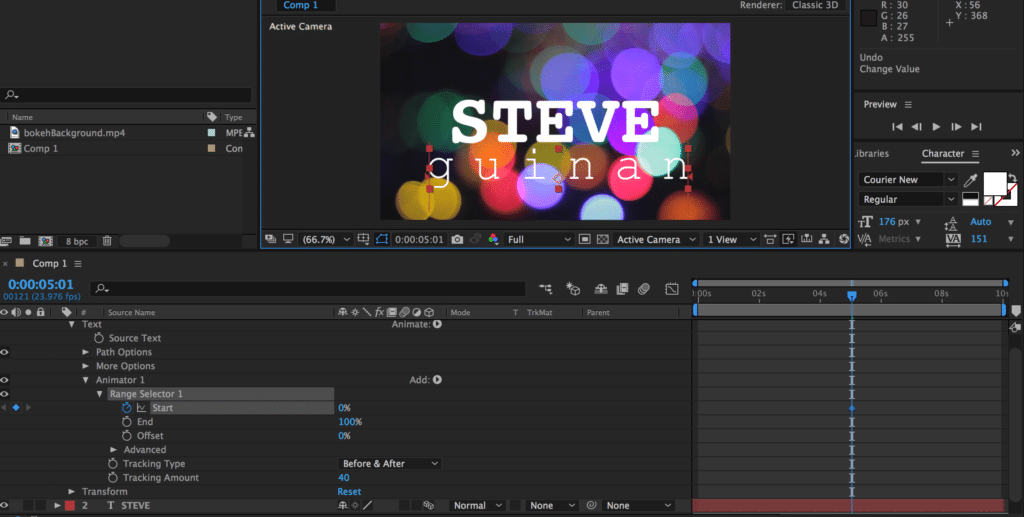
- Move your Current Time Indicator to around the eight-second mark, then change the value of Start to 100. Expand the “Advanced” property and change “Based On” from Characters to Words.
- Close down Animator 1 and rename this to “Tracking.”
- Select the text again and make sure that no property is selected, then add a Blur Animator. Rename this to “Blur,” with 20 as the value of the Blur. Again, make sure you’re at the five-second mark, then add a keyframe at the Start property. Move the Current Time Indicator to the eight-second mark, then change it to 0. Change “Based On” from Characters to Words, as well.
- Now we need to add a fade-in so that the text doesn’t just pop in. This time, we’ll animate one of the Layer Transform properties. Move to the beginning of your last name layer, then close the Text properties and expand the Transform properties. Change the Opacity to zero (at the five second mark) to add a keyframe. Move to the seven-second mark and change the opacity to 100.
- Select your text layer once again and press “U” to show all your keyframes, then press F9. This will change all your keyframe types to Easy Ease. What this does is start the animation slowly and end it slowly, so that it doesn’t look linear or mechanical.
- For our last step, turn on Motion Blur on the timeline and on the text layer itself. This will make your animation look more natural, because moving things have a natural motion blur.
- Play with any settings to make the video unique!
- Once you have expanded on this exercise, Render the video as a file called AE_Ch3Ex_2(YourInitials), and place it in the Network Drive for grading.
Grading (10 Pts)
- The file was rendered correctly- including the correct file name
- The animation is 10 seconds in length
- Your first name is animated properly
- Your last name is animated properly
- Creativity is considered
- You expanded on the exercises ideas
- All of the directions were followed