Chapter 2: Links and Images
Goals for this Lesson
- Create new HTML pages
- How to insert an image
- Understand image properties
- Insert absolute links
- Insert relative links
- Create image links
Exercise
Objective
- Insert links to create a website that can link webpages together.
- Insert images into a webpage.
Instructions
- Open Dreamweaver and be sure to work within your Web Design and Interactive Media website from Chapter 1 Exercise. The Web Design folder on the desktop should be the Local Site Folder.
- Open the index.html file.
- Download the files needed for the exercise here.
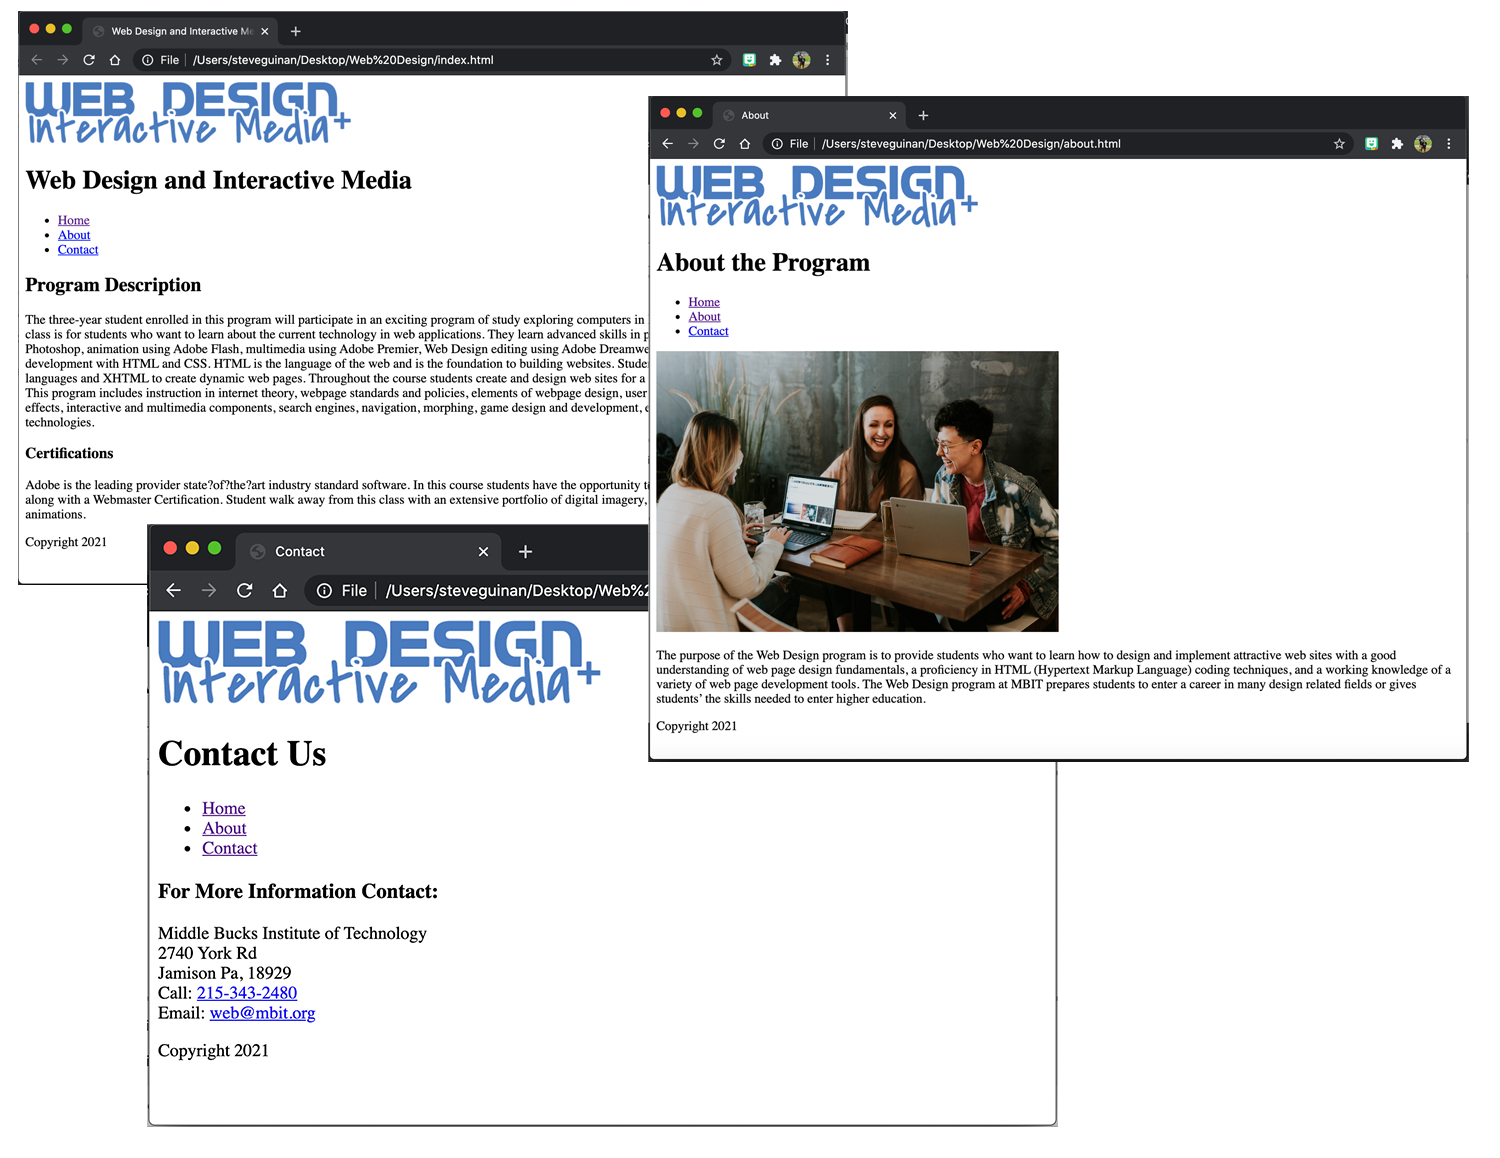
- Insert the weblogo.png file in the header above the heading.
- In the properties panel change the width to 400px (make sure the height is locked so it stays proportional)
- Add the Alternative Text to say: Web Design Logo
- Link the image to the index.html file.
- In the nav bar create links that will make the navigation useable. Link the word Home to the already created index.html page. Link the word About to a not yet created about.html page and link the word Contact to a not yet created contact.html page. (You will create these pages next)
- Save the index.html file.
- Create a new html file and title it About
- Save the newly created html file as: about.html
- Copy everything within the body tag from the index.html file into the newly created about.html file.
- Change the h1 tag in the header to say: About the Program
- Delete everything in the main and create a new section (in the main) that uses the paragraph text provided from the files you downloaded. Make sure the paragraph is wrapped in a p
- Insert the image students.jpg above the paragraph text but still within the section tag.
- In the properties panel change the width to 500px (make sure the height is locked so it stays proportional)
- Add the Alternative Text to the image to say: Web Students
- Save the about.html file.
- Create a new html file and title it Contact
- Save the newly created html file as: contact.html
- Copy everything within the body tag from the about.html file into the newly created html file
- Change the h1 tag in the header to say: Contact Us
- Delete everything within the section (in the main). Paste the text provided from the files you downloaded.
- Wrap the words: For More Information Contact: in a h3
- Wrap the Address, Phone Number, and Email in one p
- Break the Address, Phone Number, and Email onto their own separate lines by using the break tag. (see example image)
- Insert a telephone link so the phone number is a clickable link to the phone number.
- Insert an email link so the email is a clickable link to the email address.
- Save the contact.html file.
- Preview your newly created website in the browser to make sure the website navigates page to page and that all links work.
- Submit the root folder that you named: Web Design into the shared drive.