Chapter 8: Interactivity
Goals for this Lesson
- Use Dreamweaver behaviors to create an image rollover effect
- Insert an Accordion widget
Exercise
Instructions
- Download the file needed here. Create a new site for the project in Dreamweaver: Call the site: Ch 8 Exercise. Be sure to link the root folder and the images folder.
- Open the index.html file in Dreamweaver.
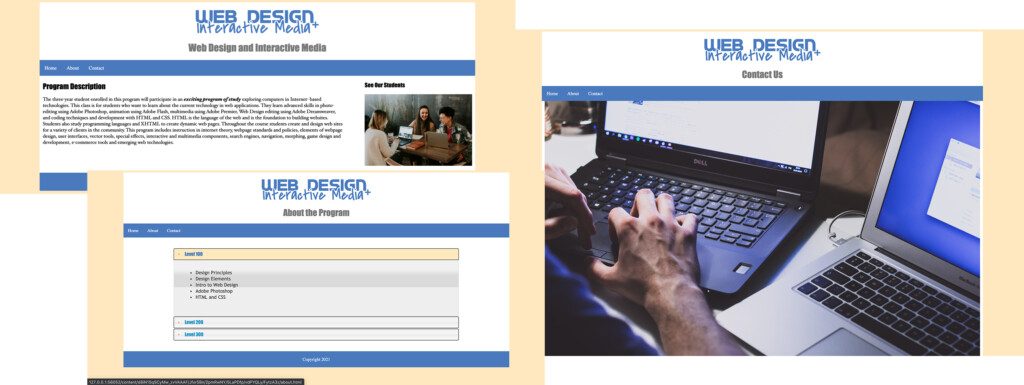
- In the empty p tag below the heading that says “See Our Students” insert the students1.jpg image. Be sure to give it alt text. Give it a width of 100% and delete the height so it spans the width of the entire container.
- Give the newly inserted image an id of students1
- You will now create a behavior so that when you hover over the heading “See Our Students” a new image will appear and then disapear to the original image when your mouse in not hovering over the heading:
- In code view, select the heading “See Our Students” and open the Behaviors Panel
- Add a Swap Image Behavior – Make sure Students1 is selected as the image and browse to select the new image Students2.jpg -Be sure Preload image is selected.
- Now the image should swap to the new image when you hover over the heading – test it out!
- When the cursor moves away from the text, the original image doesn’t return. The reason is simple: You didn’t tell it to return. To bring back the original image, you have to add another command—Swap Image Restore—to the same element:
- In code view, be sure the heading “See Our Students” is elected and the Behaviors Panel is open.
- Add the Behavior: Swap Image Restore – Now the heading will swap images as you hover and it will return back to the original image when you are not hovering.
- Save your work.
- Open the about.html file.
- Insert a jQuery Accordion in the main tag.
- Change the Section 1 heading to say: Level 100, Change the Section 2 heading to say: Level 200, Change the Section 3 heading to say: Level 300
- Change the Level 100 content to say (in a bulleted list):
- Design Principles
- Design Elements
- Intro to Web Design
- Adobe Photoshop
- HTML and CSS
- Change the Level 200 content to say (in a bulleted list):
- Adobe Illustrator
- Adobe Dreamweaver
- Adobe Animate
- Copyright
- Resume Writing
- Change the Level 300 content to say (in a bulleted list):
- WordPress
- Adobe After Effects
- Portfolio
- Google Analytics
- Advanced HTML and CSS
- Capstone Project
- In the stylesheet, change the width of the accordion to be 75% of the main, centered on the page (margin: auto), and margin on the top and bottom of 40px.
- In the stylesheet change the Accordion header colors, borders, and icon to match the colors of the site.
- Save the file.
- Open contact.html
- In the main insert the computer.jpg image. Be sure to give it alt text. Give it a width of 100% and delete the height so it spans the width of the entire container.
- On the newly inserted image, insert a Behavior Effect of your choice – the behavior should occur OnClick. (Test it out to make sure it works!)
- Save all the files.
- Submit the Ch8Exercise folder in the Shared Drive. It should include the CSS, Images, and html files in order to work properly.

