Chapter 3: CSS Basics
Goals for this Lesson
- CSS (cascading style sheets) terms and terminology
- The difference between HTML and CSS formatting
- How to write CSS rules by hand
- How to use the CSS Designer panel
- How to format your HTML text and structural elements
Exercise
Objective
- Insert inline styles to a webpage.
- Create and style an external stylesheet.
Instructions
- Open Dreamweaver and be sure to work within your Web Design and Interactive Media website from Chapter 2 Exercise. The Web Design folder on the desktop should be the Local Site Folder.
- Open the index.html file.
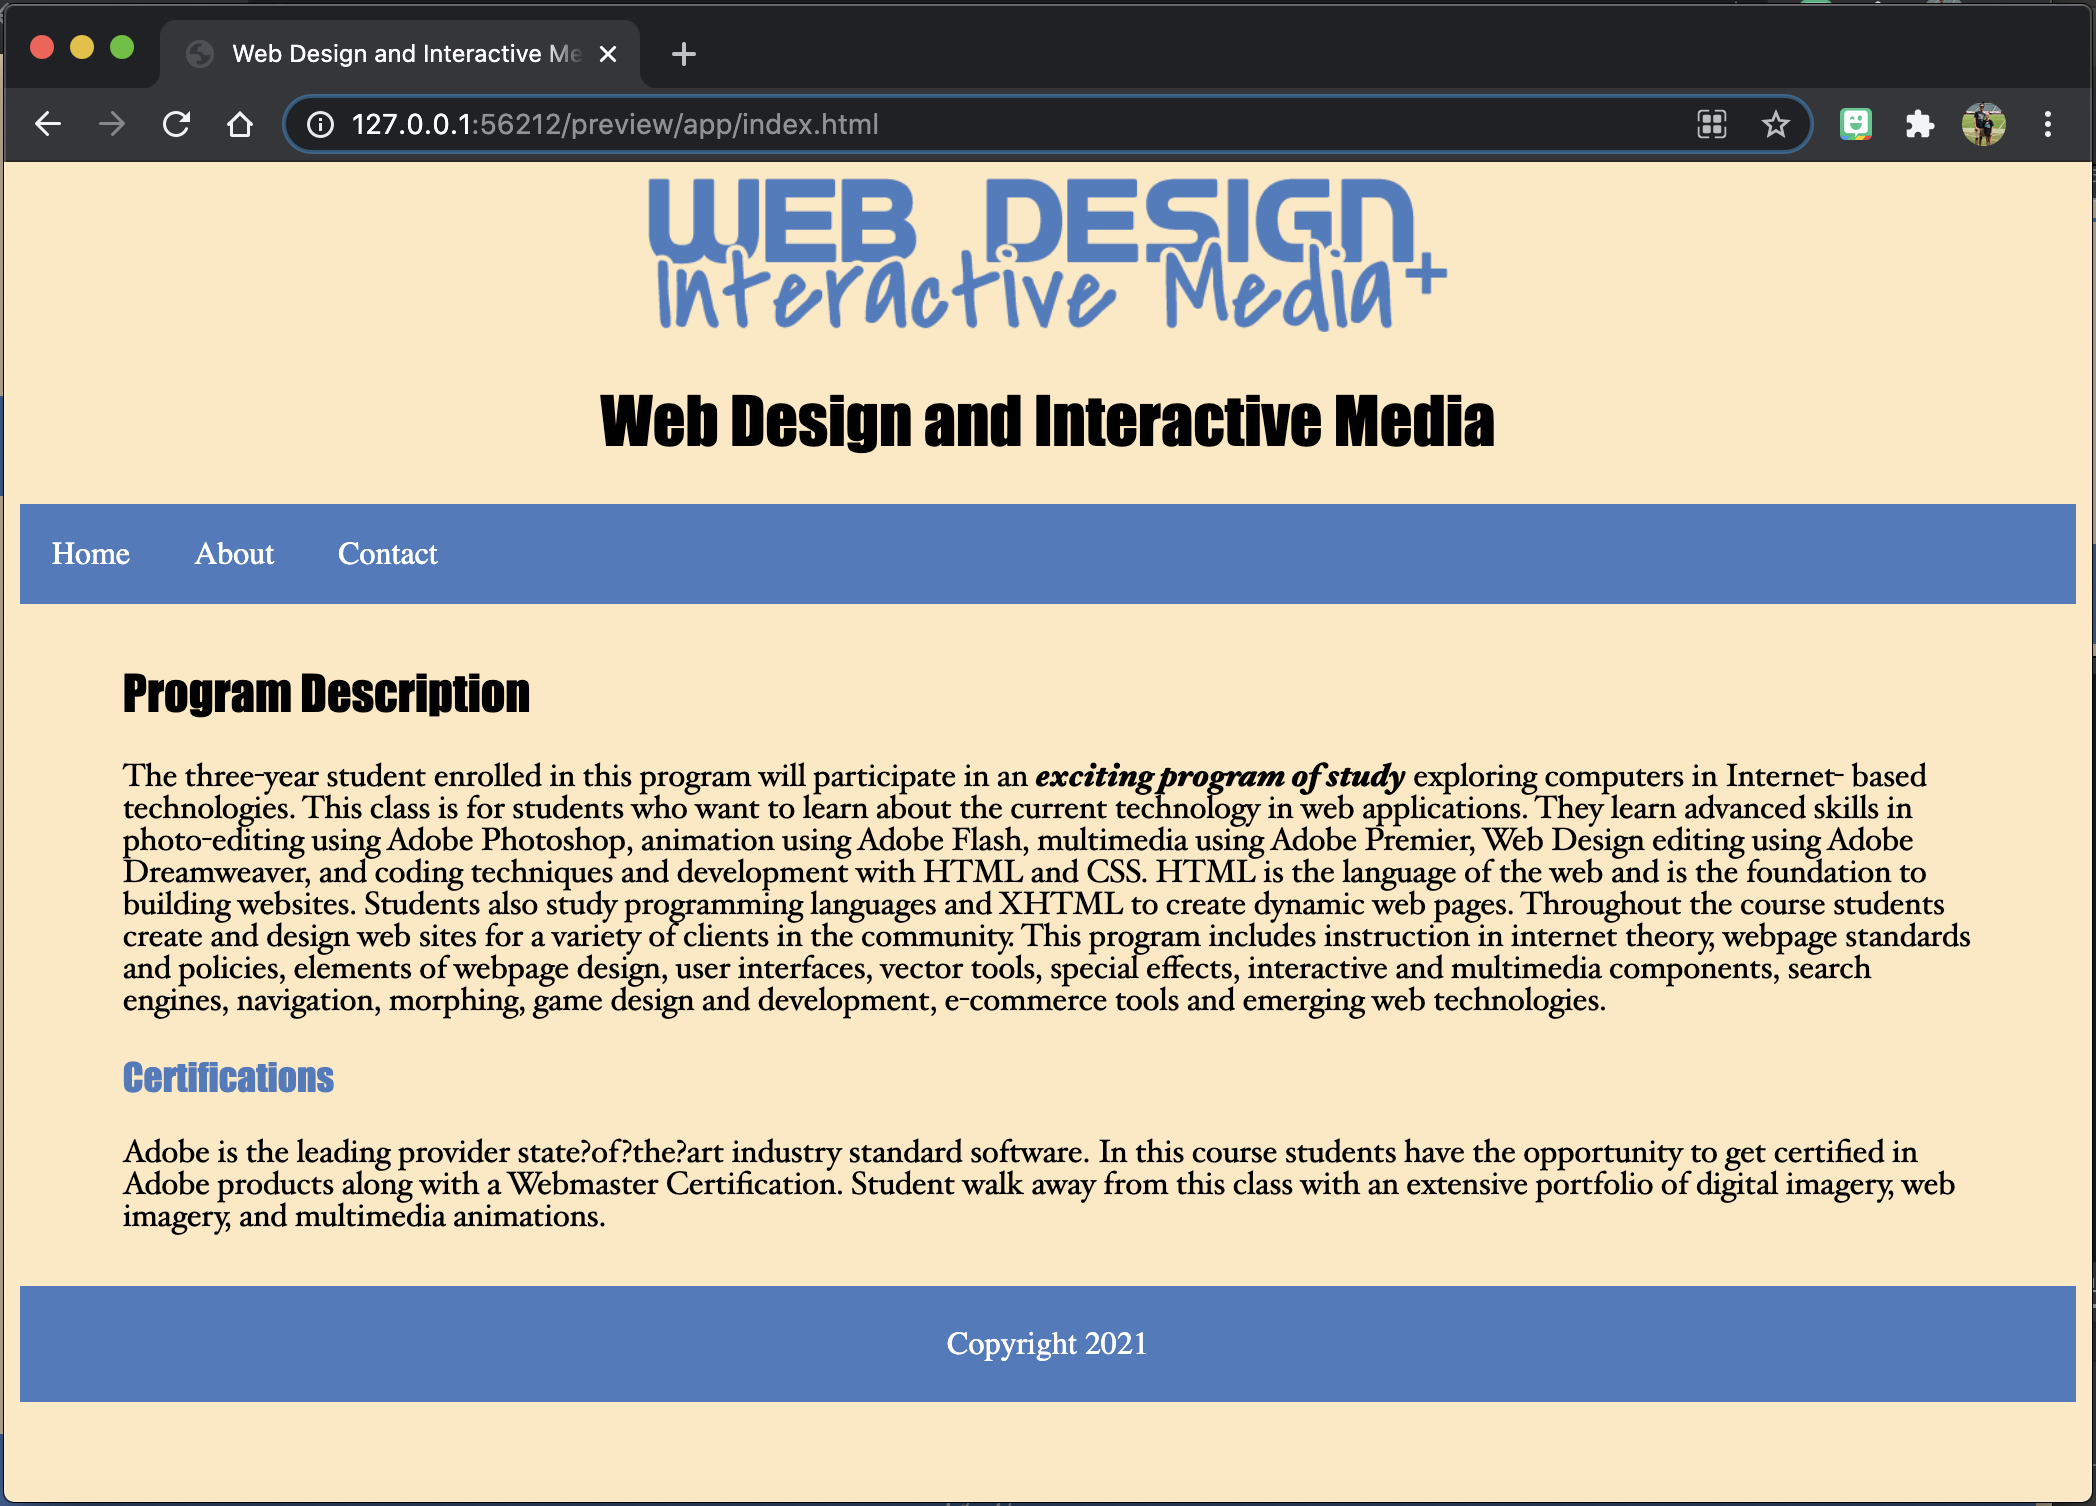
- In the first paragraph make the words: “exciting program of study” bold and italic by using the properties tab.
- Create an inline style to the word: “Certifications” (the h3 for the second paragraph) that changes the color of the text to #4A7ABE. Hint: use the properties tab.
- Create a new CSS file and name it syles.css
- Create a style that centers the header tag.
- Create a style that affects the nav ul to have:
- list-style-type: none;
- margin: 0;
- padding: 0;
- overflow-x: hidden;
- Create a style that affects the nav ul li to have:
- float:left;
- Create a style that affects the nav ul li a to have:
- display: block;
- padding: 16px;
- text-align: center;
- Create a style for the footer that centers it, gives it a background color of: #4A7ABE, and changes the text color to white.
- Create a style for the nav that gives it a background color of: #4A7ABE.
- In the style you created for the nav ul li a add a style that changes the text color to white and gives a text decoration to none.
- Create a style for the main that gives it a width of 90%, margin of auto, and padding of 10px.
- Create a style for the body and give it a background color of your choice!
- Create a style for the p tag that changes the font to a font of your choice.
- Create a style for the h1, h2, h3, h4, h5, h6 that changes the font to a font of your choice!
- Save your work! File > Save All.
- Attach the existing CSS file that you just created to the existing about.html and contact.html page.
- Save your work and Preview it! File > Save All.
- Submit the root folder that you named: Web Design into the shared drive.