Chapter 4: Id’s and Selectors
Goals for this Lesson
- Learn how to add classes to selectors
- Learn how to add id’s to selectors
- Create new page layouts
Exercise
Objective
- Insert styles to a webpage.
- Insert id’s and classes to selectors.
Instructions
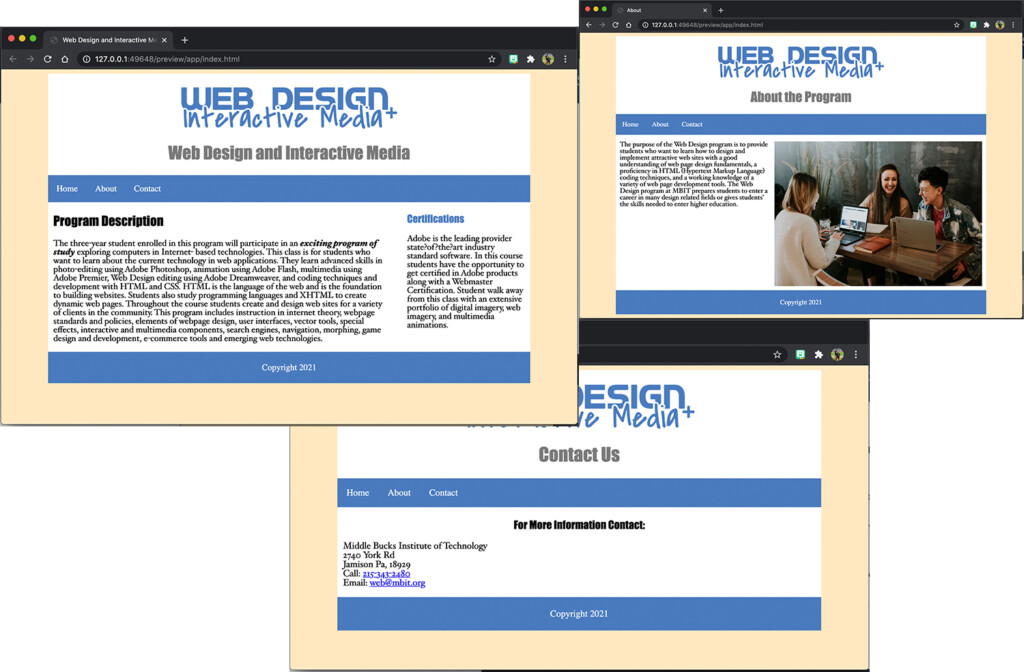
- Open Dreamweaver and be sure to work within your Web Design and Interactive Media website from Chapter 3 Exercise. The Web Design folder on the desktop should be the Local Site Folder.
- Open the index.html file.
- Delete ALL the styling for the main tag.
- Insert a div with the id of container, that hold everything within the body.
- Style the newly created id named container to have a width of 85%, margin of auto, and a background color of white.
- Insert the same div with the id of container, that hold everything within the body, in the about.html and contact.html page.
- Add padding of 25px to the top of the header.
- Add a class named: .title to the h1 in the header. Style that class to have a color of: #797979. Apply this class to the other pages where the h1 is located in the header.
- Style the main tag to have padding of 10px to the left and to the right. Also style to main to have an overflow-x of auto.
- In the index.html file, add a class called: .program to the first section.
- Style the newly created class- .program to have a width of 70% and float it to the left.
- In the index.html file, add a class called: .sidebar to the second section.
- Style the newly created class- .sidebar to have a width of 25% and float it to the right.
- In the about.html file, add a class called: .students to the image.
- Style the newly created class- .students to float to the right and have a margin to the left and bottom of 10px.
- In the contact.html file, add a class called: .information to the h3.
- Style the newly created class- .information to have it be center aligned.
- Save your work! File > Save All.
- Save your work and Preview it! File > Save All.
- Submit the root folder that you named: Web Design into the shared drive.

